Create a new group login
Creating individual logins for each Alarm.com customer website and Alarm.com app user helps keep your system secure. Group logins can be created using the Alarm.com customer website. For information about creating a login for a single system account, see Create a new login.
To create a new group login:
- Log in to the Alarm.com customer website.
- Select the group from the Locations dropdown menu.
- Click Users.
- Click Manage Logins.
- Create a new group login or elevate an existing one.
- To create a new group login:
- Click Add Group Login.
- Select the type of login to add to the group.
- Click New Login to create a new login.
- In Login Name, enter the login name for the new login.
- In Email Address, enter the email address for the new login.
- Using the Role dropdown menu, select the desired role for the login.
- Select the desired permissions for the login.
- Click Save.
- Click Associate Login to enter the login name and email of an existing login to allow it access to the group.
- In Login Name, enter the login name for the existing login.
- In Email Address, enter the email address for the existing login.
- Using the Role dropdown menu, select the desired role for the login.
- Select the desired permissions for the login.
- Click Save.
- Click New Login to create a new login.
- To elevate an existing login:
- Select the desired user.
- Using the role dropdown menu, update the roles for the desired group.
Note: Clickto expand a group and view the Subgroups or locations within it.
- To create a new group login:
Roles
Logins with Administrator permissions will have full access to manage the locations within the groups you grant access to.
Logins with Full Control have the ability to control and manage all devices and use most of the Alarm.com customer website and mobile app functionality available to the primary account login for each location in the Enterprise Group. They will not have the ability to manage Alarm.com customer website logins, and they will not receive certain types of account notifications that go only to primary account logins. Logins with Full Control do not have the ability to manage the Enterprise Group or change group-level settings.
Logins with Read Only permissions will be able to see most of the Alarm.com customer website pages and settings for each of the locations in the Enterprise Group, but will not be able to make any changes to account settings, arming state, or device status, and cannot view saved video. These logins cannot manage Alarm.com customer website logins.
You can create a Custom role to fit your exact requirements for this login. Use the checkboxes below to include a specific type of permission, and then decide what level of control to provide the login (Read Only or Full Control). Permissions will apply to each location in the Enterprise Group. You can always come back and change this in the future.
Note: Custom logins will be able to view additional Alarm.com customer website and mobile content not covered below, such as current system status, system history, their own password settings, and the system equipment list.
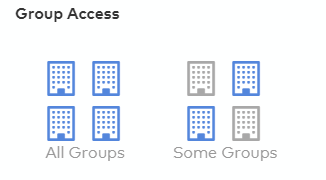
Group Access
After selecting a Role for the User Login, you will need to decide which groups they will have access to. You can either select All Groups or Some Groups, which will allow you to select from a list of your Enterprise groups.
 |