Configure an Access Control door controller to use a Static IP
Alarm.com's Access Control Door Controllers can be configured to use a static IP address.
Step 1: Configure the computer to allow a connection to the door controller
 Before logging into the controller, a computer must be configured to allow a connection to the door controller. See Windows or Mac instructions below before proceeding to Step 2.
To configure using a Windows computer:
The UI when configuring a door controller to use a static IP address will vary between Windows 11 and older versions (i.e., Windows 10).
Important: When configuring the controller to use a static IP, take note of all existing settings before changing them so that they can be changed back later.
To configure using a Windows computer with Windows 11:
- Collect the following information from the local network admin so that the controller can properly navigate their local network:
- The required Static IP
- The required Subnet Mask
- The required Default Gateway
- The required DNS Server
- Connect the controller to a Windows computer using an Ethernet cable.
- Power up the controller.
- Access the computer’s active networks menu:
- Click the search bar and enter Control Panel.

- Click Control Panel.
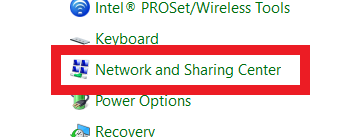
- Click Network and Sharing Center.

- Click the search bar and enter Control Panel.
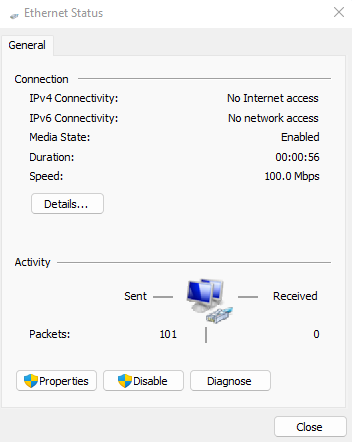
- In View your active networks, click Ethernet.

- In the network status menu, click Properties.
- Select Internet Protocol Version 4 (TCP/IPv4), then click Properties.

- Select the option to Use the following IP address and enter the following:
- IP address: 192.168.0.250
- Subnet mask: 255.255.0.0
- Default gateway: 192.168.0.1
- Select the option to Use the following DNS server address and enter the following:
- Preferred DNS server: 192.168.0.1
- Leave Alternate DNS server blank
- Click OK to accept.
Note: The Internet Properties Version 4 (TCP/IPv4) Properties page will look different when using Windows 11.

To configure using a Windows computer with Windows 10:
- Collect the following information from the local network admin so that the controller can properly navigate their local network:
- The required Static IP
- The required Subnet Mask
- The required Default Gateway
- The required DNS Server
- Connect the controller to a Windows computer using an Ethernet cable.
- Power up the controller.
- Access the computer’s active networks menu:
- Click the search bar and enter Control Panel.
- Click Control Panel.
- Click Network and Sharing Center.
- Click the search bar and enter Control Panel.
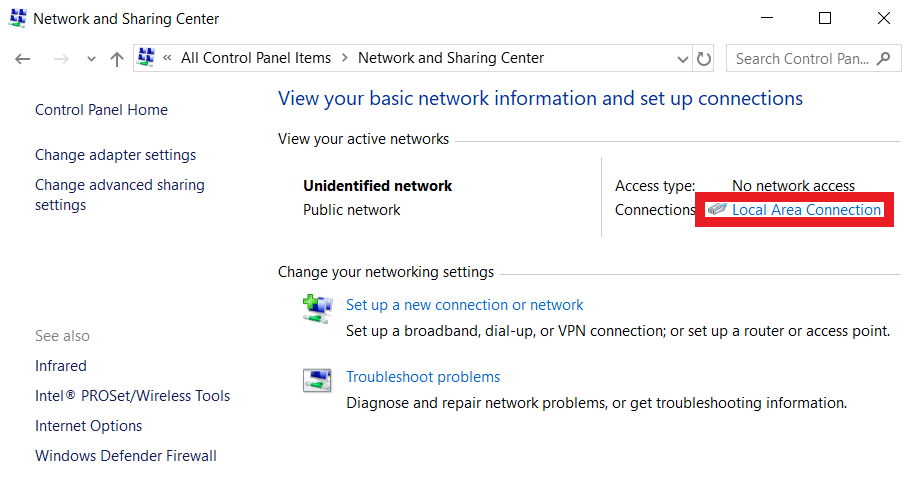
- In the active networks menu, click Local Area Connection.
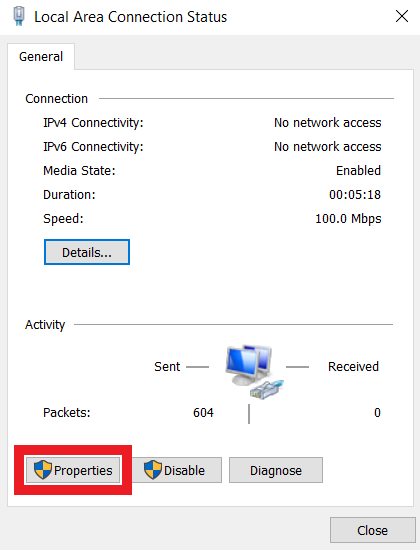
- In the network status menu, click Properties.
- Select Internet Protocol Version 4 (TCP/IPv4).

- Click Properties.

- Select the option to Use the following IP address and enter the following:
- IP address: 192.168.0.250
- Subnet mask: 255.255.0.0
- Default gateway: 192.168.0.1
- Select the option to Use the following DNS server address and enter the following:
- Preferred DNS server: 192.168.0.1
- Leave Alternate DNS server blank
- Click OK to accept.
Note: The Internet Properties Version 4 (TCP/IPv4) Properties page will look different when using Windows 11.

To configure using a Mac:
Important: When configuring the controller to use a static IP, take note of all existing settings before changing them so that they can be changed back later.
- Collect the following information from the local network admin so that the controller can properly navigate their local network:
- The required Static IP
- The required Subnet Mask
- The required Default Gateway
- The required DNS Server
- Connect the controller to an Apple computer using an Ethernet cable.
- Power up the controller.
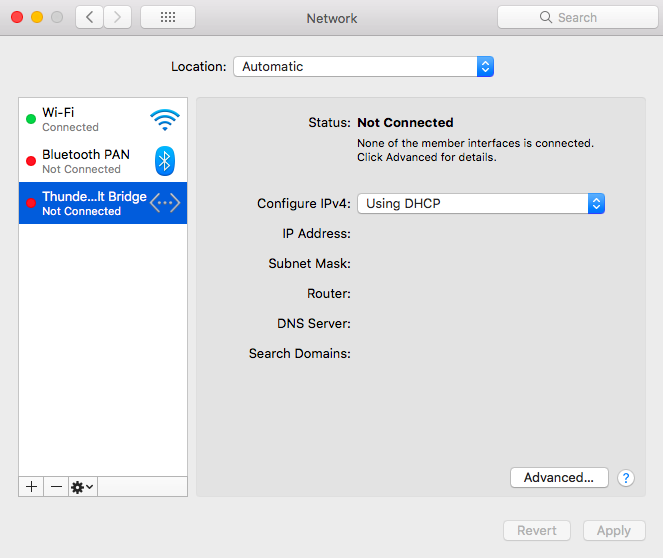
- Navigate to System Preferences.
- Click Network.

- In the list of networks, select Thunderbolt Bridge.
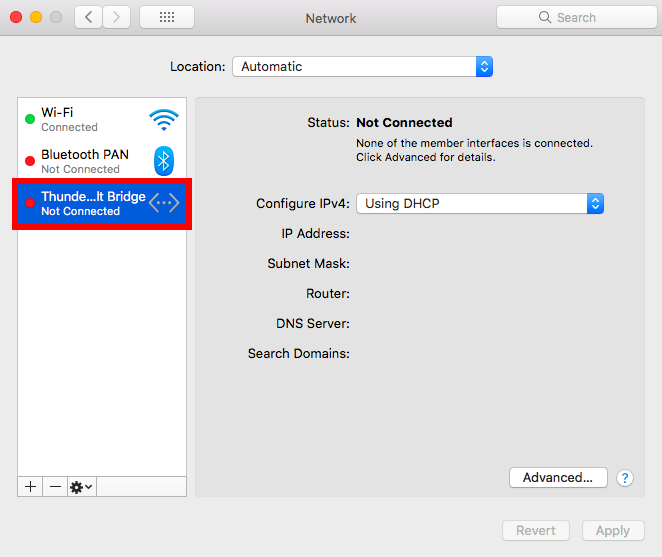
- Using the Configure IPv4 dropdown menu, select Manually.
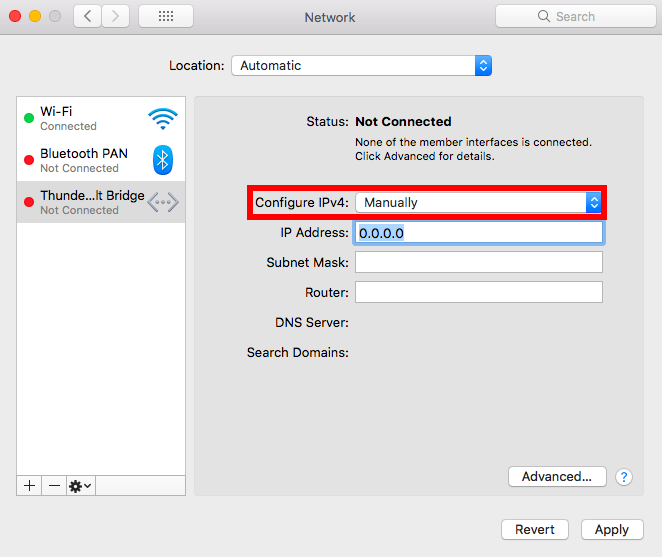
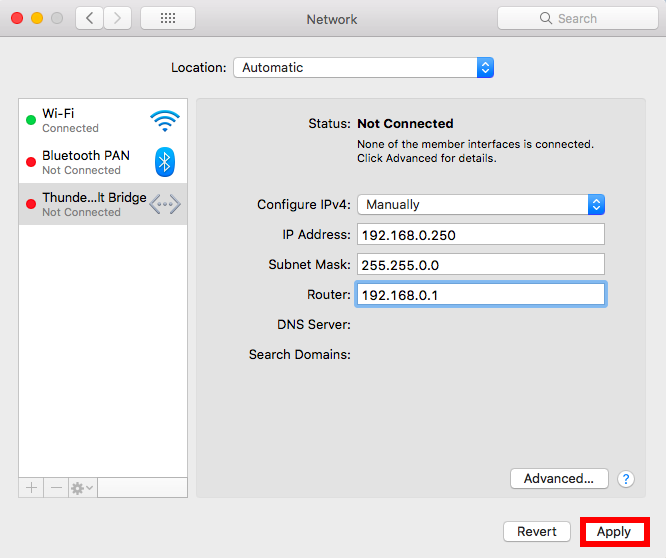
- Fill out the IP Address, Subnet Mask, and Router (Gateway).
- IP Address: 192.168.0.250
- Subnet Mask: 255.255.0.0
- Router (Gateway): 192.168.0.1
- Click Apply.
- Click Advanced.
- Click DNS.
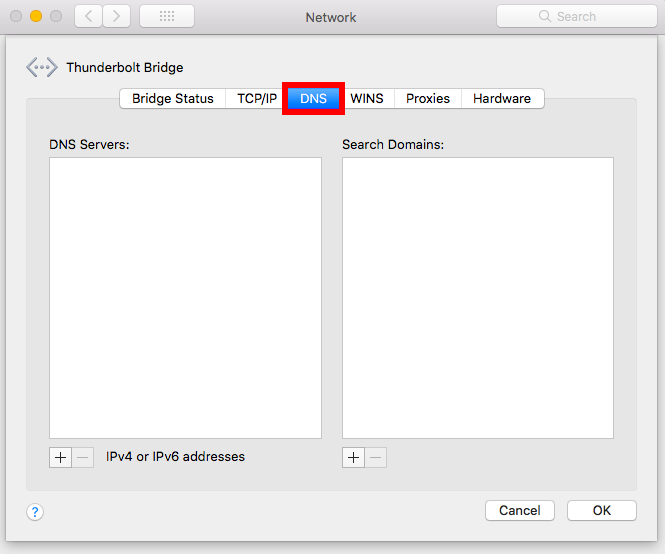
- Click
 in bottom left corner, then enter 192.168.0.1 as the DNS server.
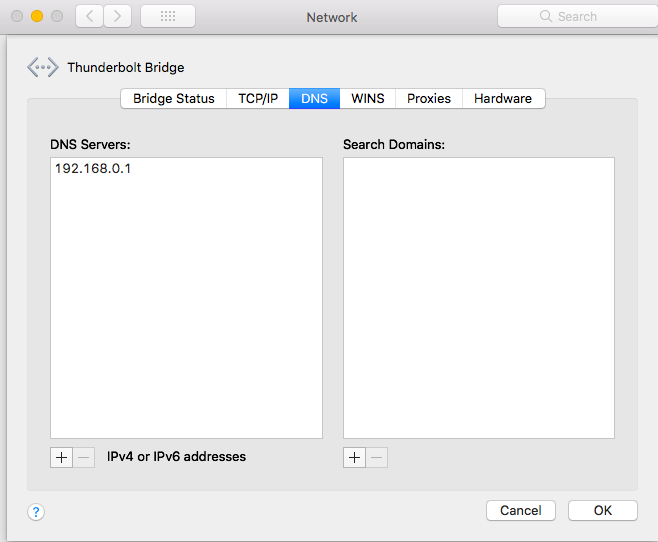
- Click OK.
- Click Apply.

Step 2: Log in to the door controller
Important: Google Chrome, Mozilla Firefox, and now Microsoft Edge have deployed updates that change the process of loading the ADC-ACC1-17 controller's UI. When using an ADC-ACC1-17, use the steps specified for that controller to ensure that the controller is able to be effectively accessed.
To log in to an ADC-AC-MP1501, ADC-AC-MP1502, ADC-AC-LP1501, ADC-AC-LP1502, or ADC-AC-X1100 door controller:
- Engage DIP switch 2 into the ON position and power cycle the controller by either:
- Pressing the button next to the DIP switches (if available).
- Pressing the button next to the BT1 battery (if available).
- Removing the power source and then reapplying.
- After about 30 seconds, verify the computer is not connected to a wireless network, open a web browser on the computer that is hardwired to the controller, and enter the address 192.168.0.251.
- Use an up-to-date internet browser (e.g., Google Chrome, Mozilla Firefox, Safari, etc.).
- It may be required to power cycle the controller again if 192.168.0.251 fails to load anything. If it continues to fail, disable the computer’s Wi-Fi and refresh the browser.
- A security warning may appear that says the connection is not private. Click advanced or details and click go on to the webpage to allow the computer to proceed to the controller’s UI.
- Once the page loads there will be an option to log in. Engage DIP switch 1 in the ON position and use the following default credentials:
- Username: admin
- Password: password

- Change DIP switches 1 and 2 into the OFF position once the computer is successfully logged into the interface.
- Click the Network option. The following can be configured from here:
- The required Static IP
- The required Subnet Mask
- The required Default Gateway/Router
- The required DNS Server

- Once complete, click Accept.
- Click Apply Settings in the menu on the left, then Apply Settings, Reboot.

- From here, the controller can be connected back to the network. If the controller does not come online within two minutes, power cycle the unit or press [Hard Reset (S2)] on the controller (if available).
- Remember to change all the settings that were altered in the Internet Protocol Version 4 (TCP/IPv4) properties menus back to what they were before in order for the computer to resume its hardwired connection to the network.

To log in to an ADC-ACC1-17/ADC-AC-EP1501 door controller:
- Engage DIP switches 2 and 3 into the ON position and power cycle the controller by either:
- Pressing the button next to the DIP switches (if available).
- Pressing the button next to the BT1 battery (if available).
- Removing the power source and then reapplying.
- After about 30 seconds, verify the computer is not connected to a wireless network, open a web browser on the computer that is hardwired to the controller, and enter the address 192.168.0.251.
- It may be required to power cycle the controller again if 192.168.0.251 fails to load anything. If it continues to fail, disable the computer’s Wi-Fi and refresh the browser.
- A security warning may appear that says the connection is not private. Click advanced or details and click go on to the webpage to allow the computer to proceed to the controller’s UI.
- Once the page loads there will be an option to log in. Engage DIP switch 1 in the ON position and use the following default credentials:
- Username: admin
- Password: password
- Change DIP switches 1, 2, and 3 into the OFF position once the computer is successfully logged into the interface.
- Click the Network option. The following can be configured from here:
- The required Static IP
- The required Subnet Mask
- The required Default Gateway/Router
- The required DNS Server
- Once complete, click Accept.
- Click Apply Settings in the menu on the left, then Apply Settings, Reboot.
- From here, the controller can be connected back to the network. If the controller does not come online within two minutes, power cycle the unit or press [Hard Reset (S2)] on the controller (if available).
- Remember to change all the settings that were altered in the Internet Protocol Version 4 (TCP/IPv4) properties menus back to what they were before in order for the computer to resume its hardwired connection to the network.