Manage Access Plans
Access Plans allow users to have access to specific doors at specific times. Access Plans can be managed using the Alarm.com app and Alarm.com customer website. For more information, see Add an Access Plan.
Advanced filters can be used to locate a specific user or subset of users. For more information, see Search for users with filters.
Note: Changes to User Access will be sent to the system after 2 minutes of inactivity on the page.
Note: To view a list of all Access Plans, click  using the Alarm.com customer website or tap Actions, then List Layout using the Alarm.com app.
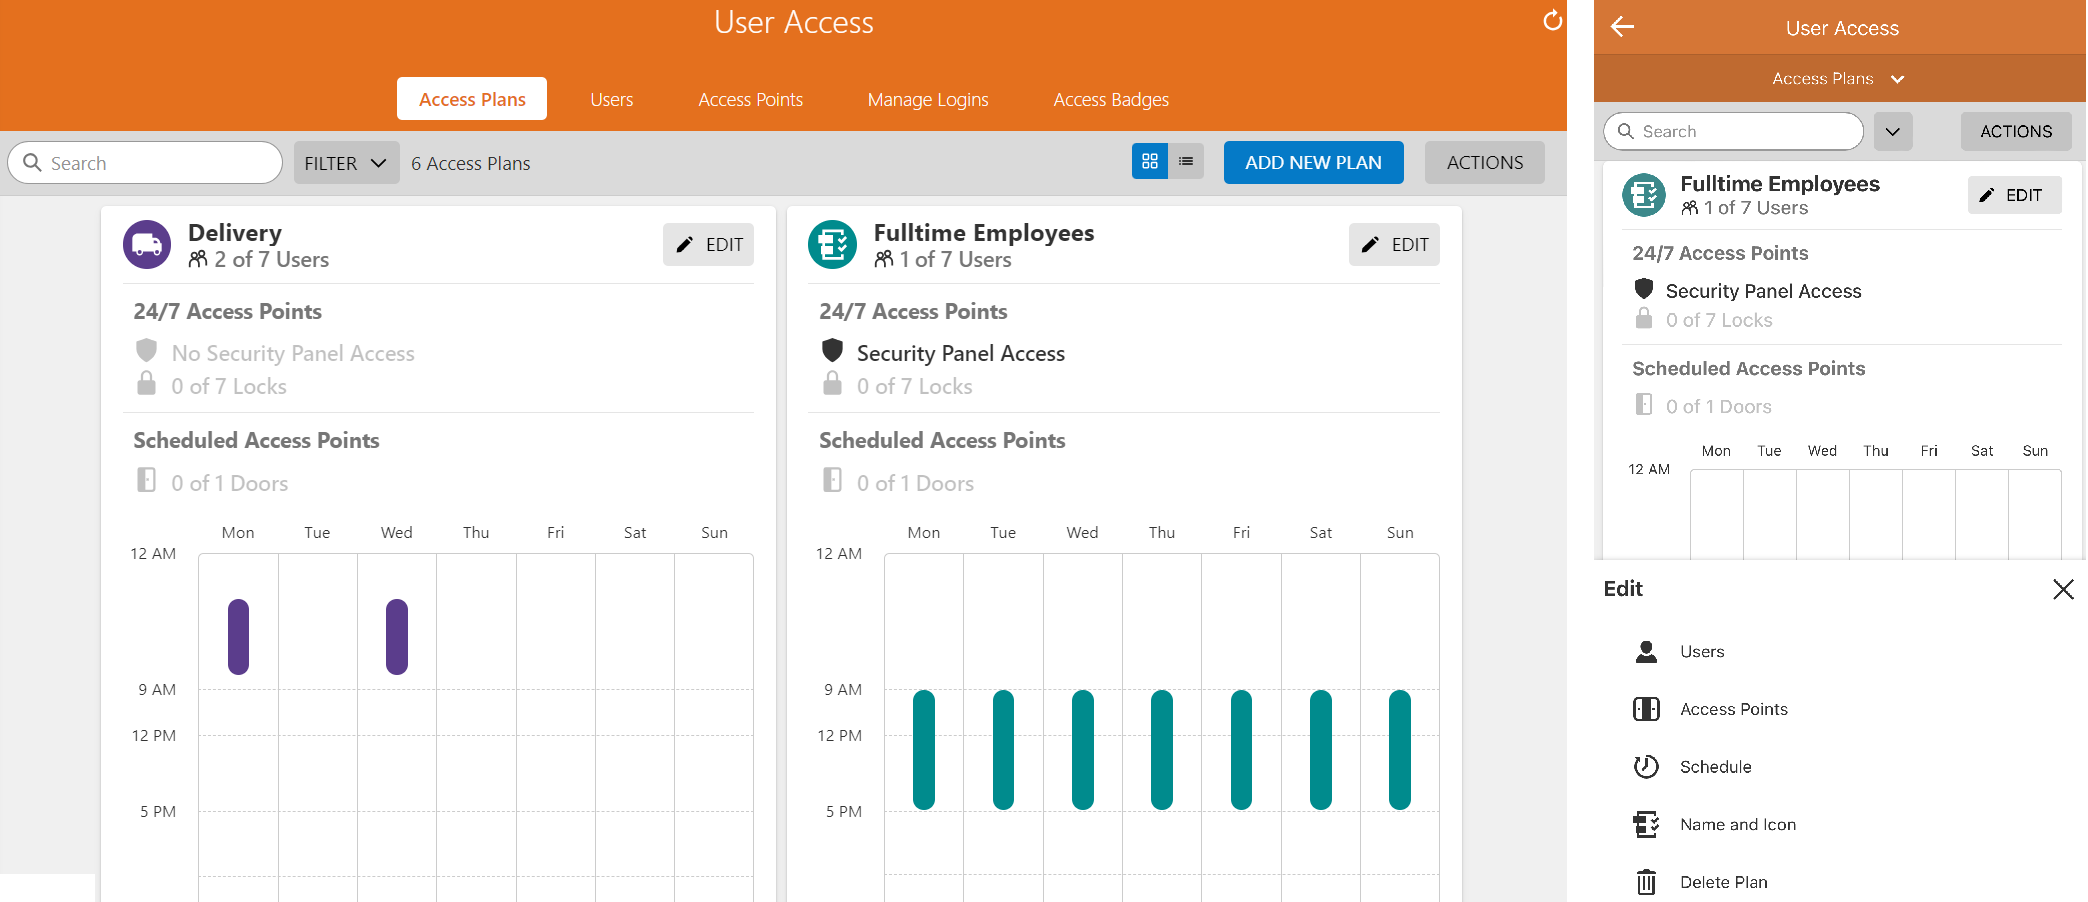
Access Plan
An Access Plan consists of the following:
| Timetable |
Select the times the users in the plan can be granted entry to an access control door. Note: Timetables can contain a maximum of 12 time blocks. |
|---|---|
| Users |
Select which users will be allowed access to which access points and when. |
| Access Points |
Select which doors will be part of the Access Plan. Panel, partition, and Z-Wave locks access can also be selected. Note: Panel and Z-Wave lock access do not follow the timetable, and users will be able to use either 24/7.  |
| Schedules |
Each day can have the same timetable or a unique schedule. Begin creating timetables by selecting one day of the week – the Edit Time Block window will appear. Choose the start and stop times, then schedules can be copied across other days using the Edit Time Block window if desired. Note: Although you have the option of extending a timetable beyond a 24-hour period, it is a best practice to set the time block for the same day. |
| Managing holidays |
Plans can also be paused on days when the business will not be open or employees do not need to access the business.
|
Best practices
- Identify Access Points and access credentials (badges or pin codes) before adding users and Access Plans to the account.
- Quickly add new badges by scanning at a card reader using the Alarm.com app.
- Focus each Access Plan on a common theme, such as employee type, door (access point), or schedule.
- Each user must have the correct credential type for all Access Points in the plans they are added to. Before creating an Access Plan, verify that each user has the correct access credentials.
Add an Access Plan
Access Plans can be created from the User Access section of the Alarm.com app or Alarm.com customer website.
To add an Access Plan using the Alarm.com app:
Note: These instructions apply to single-system Access Plans. For information about Enterprise Access Plans, see What is an Enterprise Access Plan?.
- Log in to the Alarm.com app.
- Tap
 .
. - Tap User Access.
- Tap Actions, then select Add New Plan.
- Select an icon and enter a name for the Access Plan, then tap Next.
- Tap Add Users.
- Select which users to add to the plan, then tap Save.
- Tap Add Access Points.
- Select which Access Points to include in the plan, then tap Save.
- Tap Add Schedule.
- Select a schedule to apply to the plan, then tap Save.
- Review the finalized Access Plan, then tap Save.
To add an Access Plan using the Alarm.com customer website:
Note: These instructions apply to single-system Access Plans. For information about Enterprise Access Plans, see What is an Enterprise Access Plan?.
- Log in to the Alarm.com customer website.
- Click User Access.
- Click Add New Plan.
- Select an icon and enter a name for the Access Plan, then click Next.
- Click Add Users.
- Select which users to add to the plan, then click Save.
- Click Add Access Points.
- Select which Access Points to include in the plan, then click Save.
- Click Add Schedule.
- Select a schedule to apply to the plan, then click Save.
- Review the finalized Access Plan, then click Save.
Search for users with filters
Filters can be used to search for a specific user or subset of users using the Alarm.com app or Alarm.com customer website.
The following advanced search filters are available to locate users:
- Credentials
- Search for users that have a badge, pin, or mobile credential.
- Search by card credential number in the search bar to locate the card owner.
- Contact Information
- Search for users that have a mobile number or email address.
- Access Periods
- Search for users that have an expired credential or a future credential start date.
- User Statuses
- Search for users that are paused.
- Search for users that use the extended unlock time feature.
- Search for users that are Anti-Passback exempt.
- Search for users that are a Mobile Credential user.
- Access Points
- Search for users that have access to the selected Access Point (i.e., Access Control door, panel partition, or Z-Wave lock).
- User Groups
- Search for users that are part of a specific User Group.
- Access Plans
- Search for users that are part of a specific Access Plan.
- User Information
- Search for users that have specific user information.
To search for users with filters using the Alarm.com app:
- Log in to the Alarm.com app.
- Tap
 .
. - Tap User Access.
- Tap Access Plans.
- Tap Users.
- Tap
 .
. - Select the desired filters.
- Once the desired filters are selected, tap out of the current dropdown to update the list.
To search for users with filters using the Alarm.com customer website:
- Log in to the Alarm.com customer website.
- Click User Access.
- Click Users.
- Click Filter.
- Select the desired filters.
- Once the desired filters are selected, click out of the current dropdown to update the list.