Enable or edit Smarter Business Reports
Smarter Business Reports can be enabled and edited using the Alarm.com app and Alarm.com customer website. For more information about how to generate a Smarter Business Report, see Generate a Smarter Business Report.
Enable or edit Smarter Business Reports
To enable or edit Smarter Business Reports using the Alarm.com app:
- Log into the Alarm.com app.
- Tap
.
- Tap Reports.
- Create a new report or edit an existing one.
- To create a new report, tap
, then select the type of report to be generated.
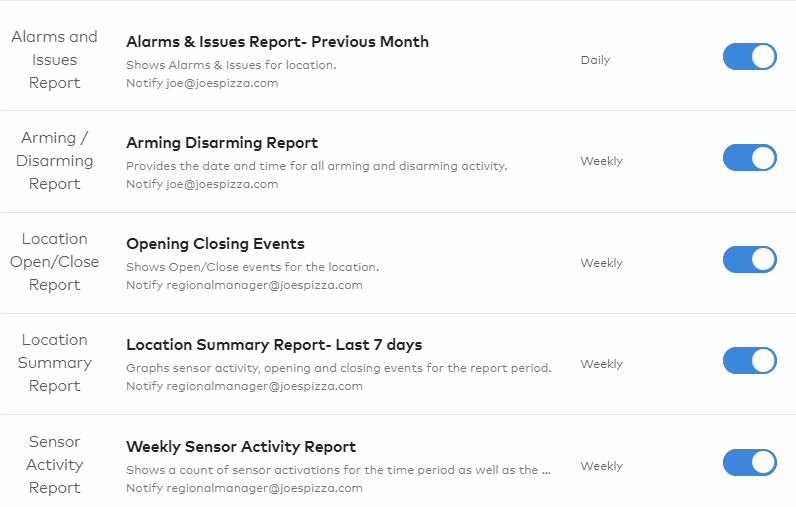
- The following reports are recommended for optimum awareness of any issues, trends, and peak activity times at your business:
- To edit an existing report, tap
next to the desired report, then tap
.
Note: To delete an existing report, tapnext to the desired report, then tap
.
- To create a new report, tap
- Enter the desired name for the report.
- Configure the notification.
- In Locations to include in the report, select All Locations to have the report apply to all locations or Only the following locations to select the desired locations.
Note: Selecting locations to include in a report is only available with Business Activity Analytics reports (i.e., Occupancy + People Counting, Crowd Gathering, and Queue Monitoring) or with specific reports (i.e., Location Summary, Sensor Activity, SBTM Temperature History, Arming Disarming, Access History, Alarms Issues, Location Open/Close, and Video Health). For more information, contact your your service provider.
- In Locations to include in the report, select All Locations to have the report apply to all locations or Only the following locations to select the desired locations.
- In Recipients, click Add to select report recipients in the Address Book or click New to add a new Address Book entry.
- Click Save.
Note: For reports that include all locations, recipients will receive notifications from all locations in the group. If a recipient only wants notifications from one location in the group, the notification needs to be created at the single system level. For more information about how to create a notification for a single system or location, see Configure notification recipients. - Configure the report, then tap Save.
To enable or edit Smarter Business Reports using the Alarm.com customer website:
- Log into the Alarm.com customer website.
- Click Activity.
- Click Reports.
- Create a new report or edit an existing one.
- To create a new report, click
, then select the type of report to be generated.
- The following reports are recommended for optimum awareness of any issues, trends, and peak activity times at your business:

- The following reports are recommended for optimum awareness of any issues, trends, and peak activity times at your business:
- To edit an existing report, click
next to the desired report.
Note: To delete an existing report, clicknext to the desired report.
- To create a new report, click
- Enter the desired name for the report.
- Configure the notification.
- In Locations to include in the report, select All Locations to have the report apply to all locations or Only the following locations to select the desired locations.
Note: Selecting locations to include in a report is only available with Business Activity Analytics reports (i.e., Occupancy + People Counting, Crowd Gathering, and Queue Monitoring) or with specific reports (i.e., Location Summary, Sensor Activity, SBTM Temperature History, Arming Disarming, Access History, Alarms Issues, Location Open/Close, and Video Health). For more information, contact your your service provider.
- In Locations to include in the report, select All Locations to have the report apply to all locations or Only the following locations to select the desired locations.
- In Recipients, click Add to select report recipients in the Address Book or click New to add a new Address Book entry.
- Click Save.
Note: For reports that include all locations, recipients will receive notifications from all locations in the group. If a recipient only wants notifications from one location in the group, the notification needs to be created at the single system level. For more information about how to create a notification for a single system or location, see Configure notification recipients.
Additional resources