
HomeLink® Smart Home Connector
Quick facts
| Device Image | 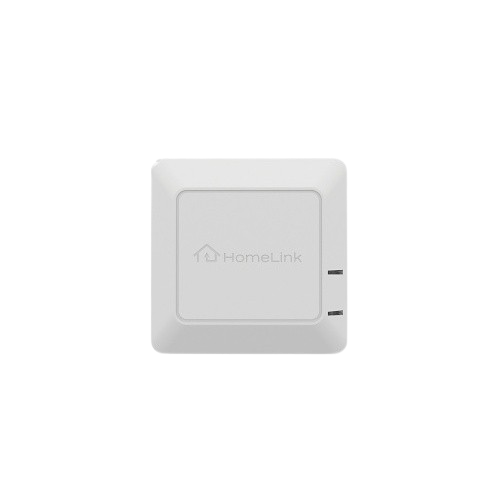 |
|---|---|
| Manufacturer | HomeLink |
| Power Requirements | 120 VAC, 60 Hz |
| Maximum Load | n/a |
| Dimming | n/a |
| Z-Wave Security 2 (S2) | Yes |
| Z-Wave SmartStart | Yes |
| Z-Wave Long Range (LR) | Yes |
The HomeLink® Smart Home Connector is a Z-Wave® bridge that allows control of up to 6 customer Scenes directly from the HomeLink buttons in compatible vehicles. This device can be enrolled in or removed from a Z-Wave network by following the instructions below.
For more information about installation, see the manufacturer's HomeLink® Smart Home Connector - Installation Guide.
Requirements
- Customers must have a compatible vehicle with a HomeLink® Smart Home Connector properly installed and plugged in.
- Enroll the Connector to the Alarm.com customer account.
- Configure Scenes using the Alarm.com app or Alarm.com customer website.
Additional considerations
- One action per button can be programmed
- Scenes can be programmed across multiple vehicles or within a single vehicle.
Example: Car 1 has three HomeLink buttons and can control three Scenes. Car 2 also has three buttons and can be programmed to control three other Scenes.
Enroll a Connector to the Z-Wave network:
This device can be enrolled using the method as a SmartStart, S2, or S0 device.
To enroll as a SmartStart device:
It is recommended to enroll this device as a SmartStart device to eliminate the need to put Z-Wave controllers into Add Mode or to trigger devices (as is the case when enrolling non-SmartStart S2 devices). This method also enables Z-Wave Long Range.
For information about SmartStart compatibility and the enrollment process, see Add or remove a Z-Wave SmartStart-enabled device.
To enroll as an S2 device:
If the Z-Wave controller is not SmartStart-compatible, it is recommended to enroll this device as an S2 device for enhanced security and encryption features.
For information about this process, see Add an S2-encrypted Z-Wave device.
To enroll as an S0 device:
If the Z-Wave controller is not SmartStart or S2-compatible, this device can be enrolled in the traditional way as an S0 device.
- Place the Z-Wave controller into Add Mode.
- Plug in the HomeLink Smart Connector. The device will automatically go into Z-Wave inclusion mode when it is plugged in.
- Allow one minute of power-on for the device to enter classic Z-Wave inclusion mode. While in inclusion mode, FUNCTION will blink blue.
- It will flash solid green when the Connector has been successfully enrolled in the network.
Plug in the Connector to a final location
Plug the Connector into a standard 120 VAC outlet in its final installation location. Once plugged in, a blue LED light will begin blinking, indicating the Connector is powered and ready for setup.
Best practices for placement:
- Intended for indoor use only
- Position it between where your vehicle is typically parked and your control panel or Z-Wave controller
- Choose a location that is easily visible from your vehicle (e.g., attached garage, a breezeway, inside entryway or foyer)
Train the handheld remote
Important: In-vehicle HomeLink programming instructions vary by vehicle make, model, and year. Visit homelink.com/program for the most accurate instructions.
- Bring the new handheld remote to the vehicle.
- Press and hold the vehicle's HomeLink button to train and any one of the handheld remote buttons until the HomeLink light changes from a slow flash to a fast flash (typically 10 to 20 seconds).
- Repeat for each desired button to program to a Scene.
Note: If a HomeLink button cannot be programmed, it may already have existing programming. Use an available unprogrammed button to preserve existing programming, or expand the following steps to erase all HomeLink in-vehicle programming:
Erase programmed HomeLink in-vehicle buttons
Caution: This process will erase all trained HomeLink buttons in the vehicle at once.
To clear all data from the HomeLink in-vehicle:
- Press and hold the first and third button for 10-seconds or until the light blinks rapidly. All data from the HomeLink in-vehicle will be cleared.
Program HomeLink in-vehicle buttons to the Connector
Once the HomeLink buttons are trained into the Connector's handheld remote, the in-vehicle buttons can now be assigned to any of the available Connector channels, 1–6.
To program a channel in the Connector:
- Press and hold the FUNCTION button until the light is blue, then release.
- Press the CHANNEL button a number of times to select the desired channel. Channel number starts at 1 and goes to 6. The CHANNEL light will blink a number of times to indicate which channel is currently selected (e.g., 3 flashes mean channel 3 is selected).
- Within 30 seconds, press the desired HomeLink button in the vehicle to assign it to that channel.
- When successful, the FUNCTION light will turn green for 5 seconds.
- If the connection is not made within 30 seconds, the FUNCTION light will flash red for 5 seconds, then return to the normal state.
- After the FUNCTION light turns off, confirm the Connector is receiving signals from the in-vehicle HomeLink module. Do this by pressing the assigned HomeLink button, the FUNCTION light should quickly blink green.
- Repeat all preceding steps for each channel to assign to a button.
Note: If the same HomeLink or handheld remote button is associated with a second channel, the association with the first channel will automatically be deleted. A remote button can only be associated with one channel.
Set up Scenes on Alarm.com
Now that the devices are set up and connected, Scenes can be configured using the New Rules Builder in Alarm.com app or Alarm.com customer website.
The device can also be viewed and configured from the Remotes section in the Scenes card or in Manage Devices.

To create/edit a scene using the Alarm.com app:

To create/edit a scene using the Alarm.com customer website:
Troubleshooting
Erase a channel in the Connector
If a channel on the Connector needs to be erased:
- Press and hold the FUNCTION button until the light is white, then release.
- Press the CHANNEL button a number of times to select the desired channel. Channel number starts at 1 and goes to 6. The CHANNEL light will blink a number of times to indicate what channel is currently selected.
- Press the FUNCTION and CHANNEL button simultaneously.
- The FUNCTION light will turn green when the deletion is complete.
Delete a Connector from the Z-Wave network
If a Connector needs to be removed from the Z-Wave network:
- Place the Z-Wave controller into Delete Mode.
- Press and hold the FUNCTION button on the Connector until the light is yellow, then release.
- The FUNCTION light will blink yellow when the Connector is waiting to be removed from the network.
- It will blink green when it has successfully been removed. It will then return to the inclusion mode, ready for adding to a Z-Wave network, indicated by the FUNCTION light blinking blue.
- If the removal fails, the FUNCTION light will flash red for 5 seconds, then return to the normal state. Try the preceding steps again. If repeated attempts are unsuccessful, you may need to perform a factory reset on the Connector to return it to inclusion mode.
Reset a Connector
After performing the following steps, all programmed channels and Z-Wave network information will be erased, and the device will restart in a factory state.
To factory reset a Connector:
- Ensure the device has power.
- Press and hold the FUNCTION button and CHANNEL button simultaneously until both lights blink red (for about 5 seconds), then release.
- A blinking blue FUNCTION light indicates it is ready to be included in a new Z-Wave network.