Smart Gateway (ADC-SG130) - Installation Guide
The Alarm.com Smart Gateway (ADC-SG130) provides a dedicated Wi-Fi network for Alarm.com Wi-Fi video cameras. Featuring WPS, you no longer need to update cameras with complicated router passwords. Simply add to an Alarm.com account, plug into any wall outlet, connect to the existing router, and pair with a Wi-Fi camera for instant, secure Wi-Fi connectivity.

Pre-installation checklist
- ADC-SG130 Smart Gateway (included)
- Ethernet cable (included)
- 12 VDC power adapter (included)
- Router with broadband (Cable, DSL, or Fiber Optic) Internet connection and an open Ethernet port
- A computer, tablet, or smartphone with an Internet connection
- Partner MobileTech app or the Login and Password for the Alarm.com account to which you will add the Smart Gateway
For a detailed list of this video device's features, see Smart Gateway (ADC-SG130) - Data Sheet.
Installation
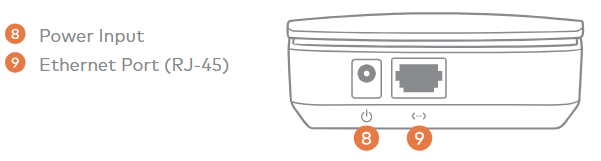
- Use an Ethernet cable to connect the Smart Gateway to an open Ethernet (RJ-45) port on the existing router.
- Connect the Smart Gateway’s DC power adapter and plug it into a non-switched outlet.
For optimal Wi-Fi performance, place the Smart Gateway on top of a table or in another location free from physical obstructions. The Smart Gateway's range matches or exceeds most typical home routers.
Add the Smart Gateway to an Alarm.com account
Note: The Smart Gateway does not take up a video device slot on the service plan. It is possible to enroll as many Smart Gateways as needed.
Add the device to the account using one of the following methods:
To add using the Alarm.com customer website:
- Using a web browser, enter the following URL: www.alarm.com/addcamera. The username and password of the account are required to log in to the Alarm.com customer website.
- Select the Smart Gateway from the video device list or enter its MAC address to begin adding the Smart Gateway. The MAC address is located on the bottom of the device or on the packaging.
- Follow the on-screen instructions to finish adding the Smart Gateway.
To add using the Alarm.com app Installation Wizard:
- Log in to the Alarm.com Alarm.com app. You will need the username and password of the account to log in.
- Tap
 .
. - Tap Add Device.
- Tap Video Camera.
- In the Enter MAC Address field, enter the Smart Gateway's MAC address.
- Follow the on-screen instructions to finish adding the Smart Gateway.
To add using the Partner MobileTech app:
- Log in to Partner MobileTech app.
- Select the customer account.
- Tap
 .
.
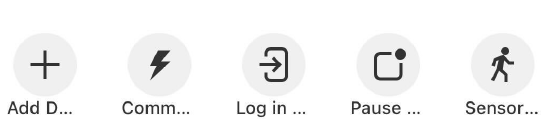
- Tap Smart Gateway.
- In the Enter MAC Address field, enter the Smart Gateway's MAC address.
- Tap Install.
Wi-Fi Protected Setup (WPS) mode
- WPS mode is the preferred way to add an Alarm.com Wi-Fi camera to the Smart Gateway’s Wi-Fi network.
- Be sure to add the Smart Gateway to an Alarm.com account before using WPS mode to add video cameras to the Wi-Fi network.
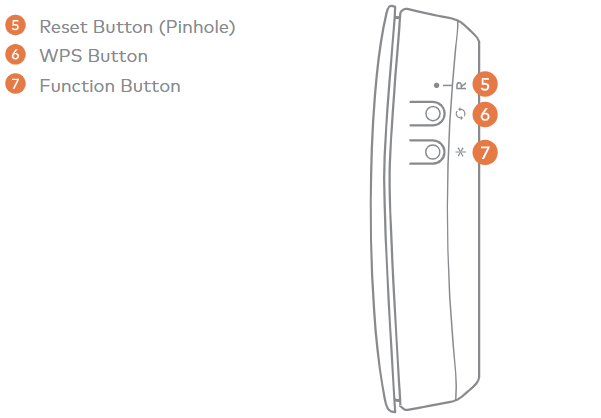
- To enter WPS mode, use either the Trigger WPS feature in the Partner MobileTech app app or press
 and hold the button for approximately 1 to 3 seconds. The Wi-Fi LED will slowly flash to indicate that the device is in WPS mode. For more information about using WPS to connect video devices, see Connect a video device to an ADC-SG130 using Wi-Fi Protected Setup (WPS).
 - Connect no more than four Alarm.com Wi-Fi cameras to the Smart Gateway at a time for optimal performance.
If WPS is not an option, access point (AP) mode is possible using the Smart Gateway's Wi-Fi credentials. For more information about finding its Wi-Fi credentials, see View the ADC-SG130's Wi-Fi password.
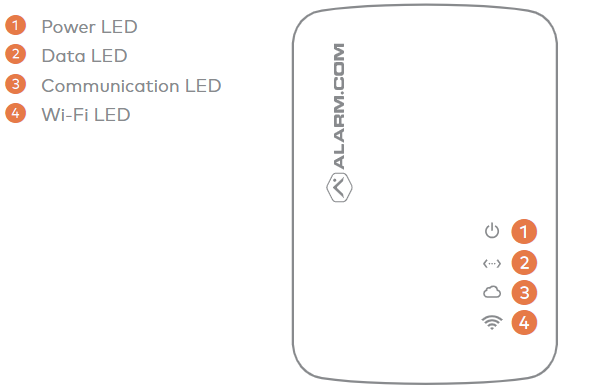
LED reference guide
Power 
| LED status | Description |
|---|---|
| On | Device is powered on |
| Off | Device is powered off |
| Flashing | Device is booting |
Data/Ethernet 
| LED status | Description |
|---|---|
| On/Flashing | Device transferring/receiving data over Ethernet. |
| Off | No data is being transferred over Ethernet. Please check the Ethernet connection between the Smart Gateway and the router. |
Communication 
| LED status | Description |
|---|---|
| On | Connected to Internet |
| Off | No local or Internet connection. See Troubleshooting. |
| Flashing (slowly) | Local connection, no Internet |
| Flashing (five quick blinks) | Communication test initiated |
Wi-Fi 
| LED Status | Description |
|---|---|
| On | Active |
| Off | Inactive |
| Flashing | WPS mode |
Additional states
| LED status | Description |
|---|---|
| All LEDs flashing (escalating) | Firmware upgrade in progress |
| All LEDs flashing (simultaneously) | Reset in progress |
Troubleshooting
If you are still having issues using the Smart Gateway, please try the following troubleshooting options:
Check your router’s connection to the Internet
If you cannot access the Internet using your router, please contact your Internet Service Provider to restore Internet access. Try adding the device again.
Perform a communication test
Press the [R] button (pinhole) for 1 to 3 seconds (use a paper clip or tool if necessary). The Communication LED will quickly flash five times to indicate that the test was sent. Please wait two minutes before trying to use the device again.
Power cycle
Unplug the device from power for 10 seconds and plug it back in. Wait for the Power and Communication LEDs to become solid before trying to use the device again.
Reset
Press and hold the [R] button (pinhole) for 15 to 20 seconds (use a paper clip or tool if necessary). All LEDs will flash simultaneously to indicate that the device will reset. Wait for the Power and Communication LEDs to become solid before trying to use the device again.
Questions?
For general information about video set up and frequently asked questions, see Video - General.