
Updated Users page
In the past, a person's name, their keypad code, and their device access were on one page, and the username and password they use to sign in to the website and app were somewhere else. Now, everything about one person is now in one place.
Updated User page actions
- Manage which users can sign in to the Alarm.com app and Alarm.com customer website
- Manage what a user is allowed to do
- Prevent someone from being able to log in to their account
- Verify if someone is able to log in to their account
- Manage users using the Alarm.com website or from a mobile device
Actions
Almost every action that was performed on the Manage Logins page now happens on the person's own page. Users should go to the Users page and select the person to complete an action. Users can be managed using the Alarm.com app or Alarm.com customer website.
| I want to | Do this |
|---|---|
| Let someone sign in to the website or app | Click/Tap Users, select their name, then select Add Login. |
| Change what someone is allowed to do | Click/Tap Users, select their name, then select App Access. |
| Stop someone being able to sign in | Click/Tap Users, select their name, then Username, then select Delete Login. |
| Check whether someone can sign in at all | Click/Tap Users, select their name. A Username row means they can while Add Login means they cannot yet. |
| Fix the same person showing up twice | Click/Tap Users, select  next to their name, then select Merge To. next to their name, then select Merge To. |
| Do any of this on my phone | The app now works like the website and the same steps as the Alarm.com customer website. |
Updates to the Users page
The Users list
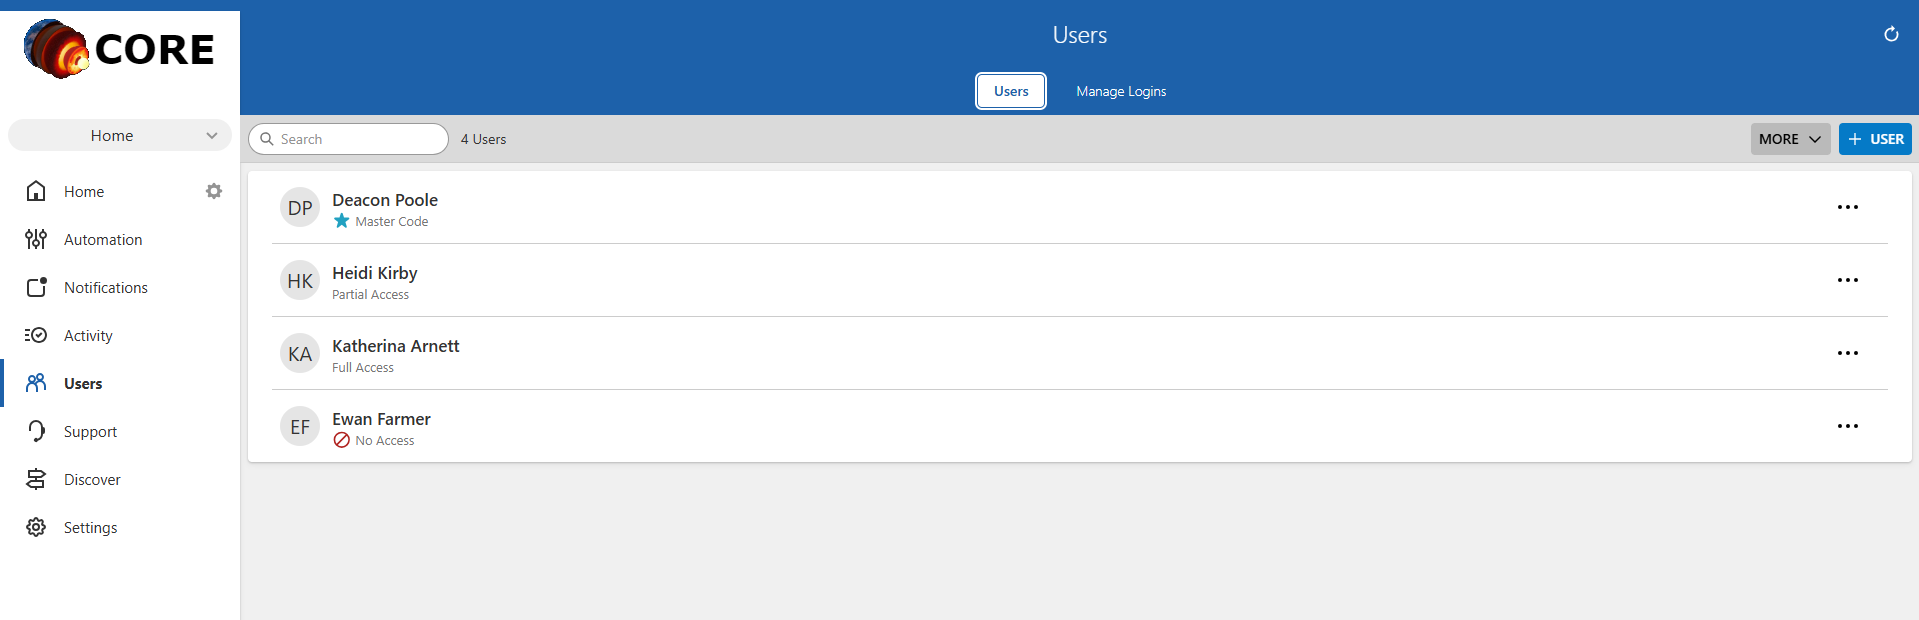
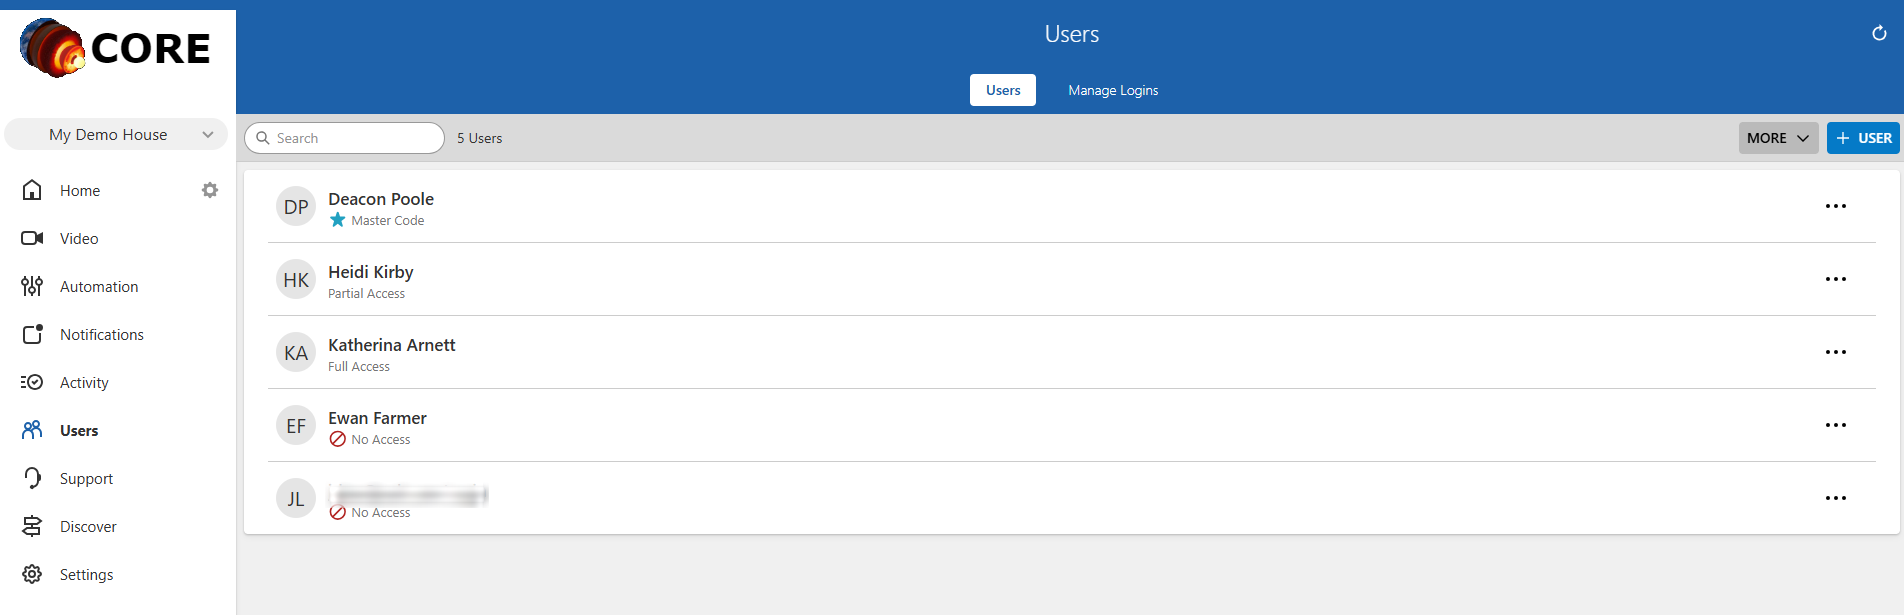
The Users page is the same as before, but every sign-in on the account is now attached to somebody in this list.
What is different?
- You may see more entries than before, and that is expected. The account in the images below went from four to five. Sign-ins that were not linked to anyone's name now appear as their own entry, named after the sign-in itself and marked No Access. Nothing was deleted and no one was given new access.
- The options icon (i.e., ) at the end of each row now offers Edit, Share, Merge To and Delete.
Note: If you see an entry named after an email address, that is a sign-in the system could not match to a person. It is not a mistake and it is not a second account. Open it and rename it, or join it to the right person.
| Old version | New version |
|---|---|
 |
 |
Someone who cannot sign in yet
What is different?
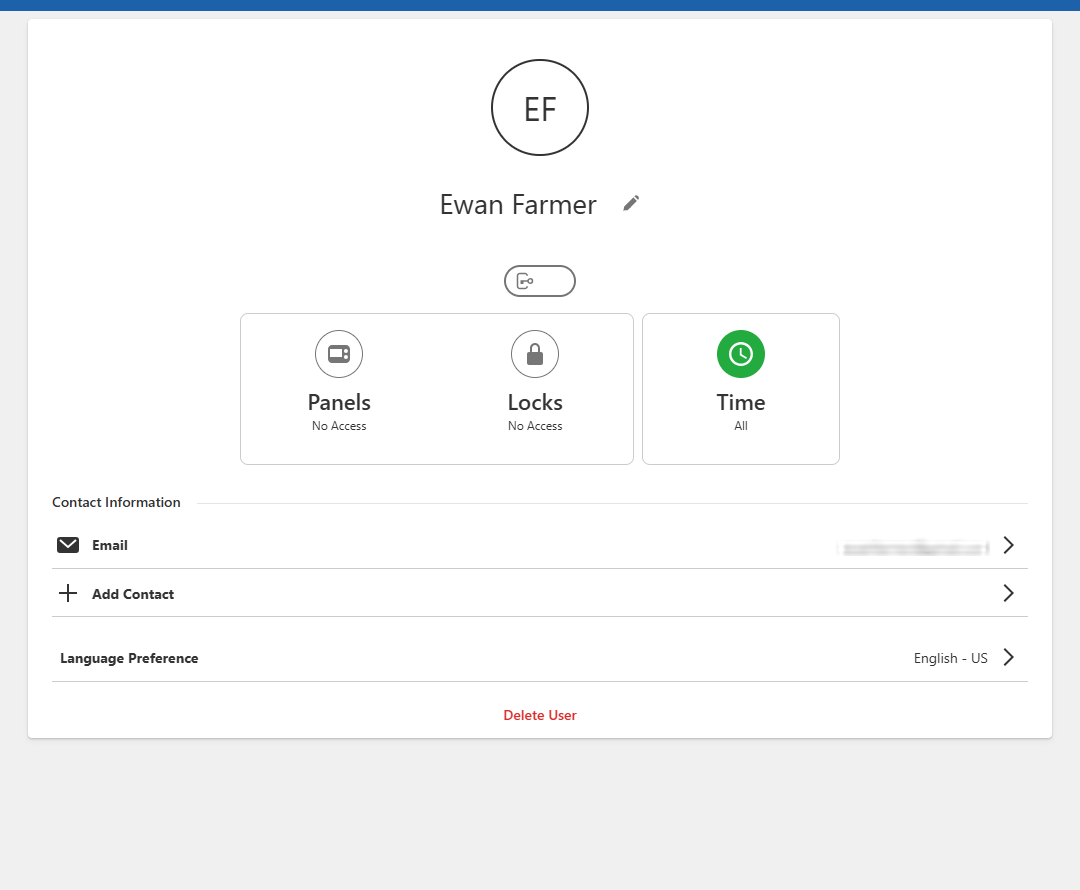
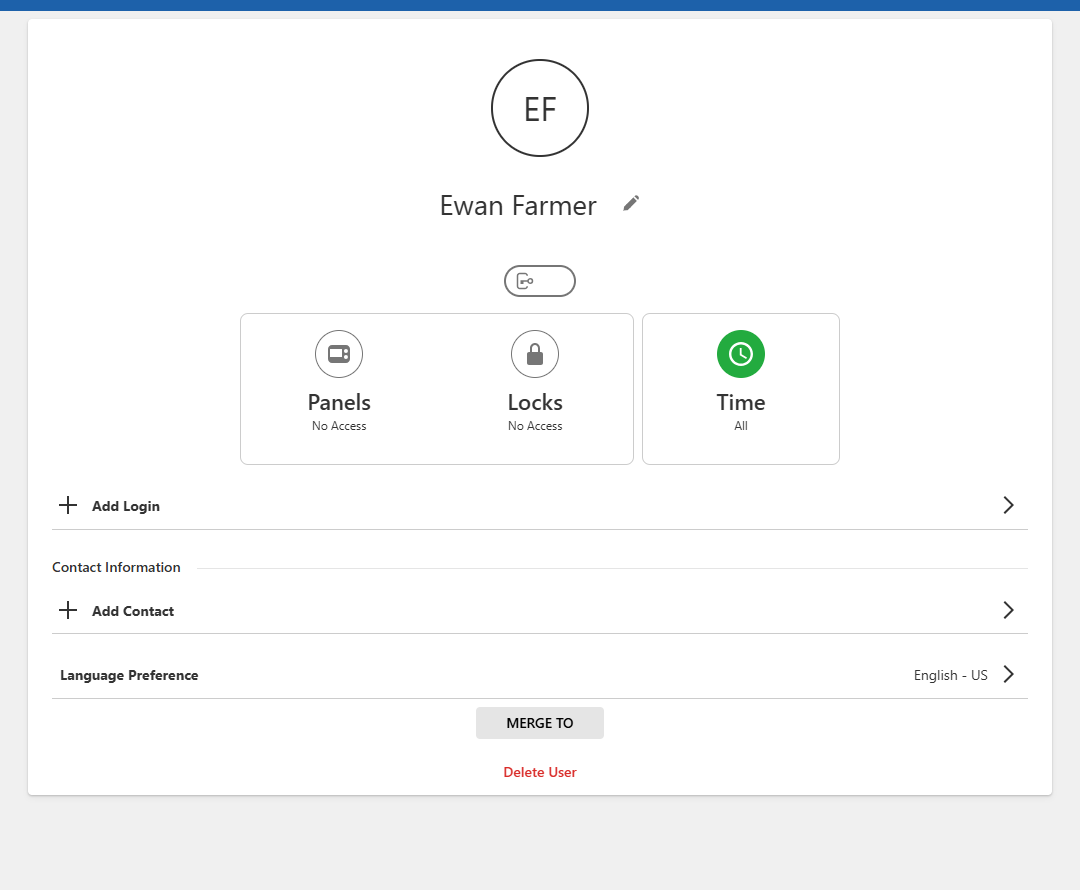
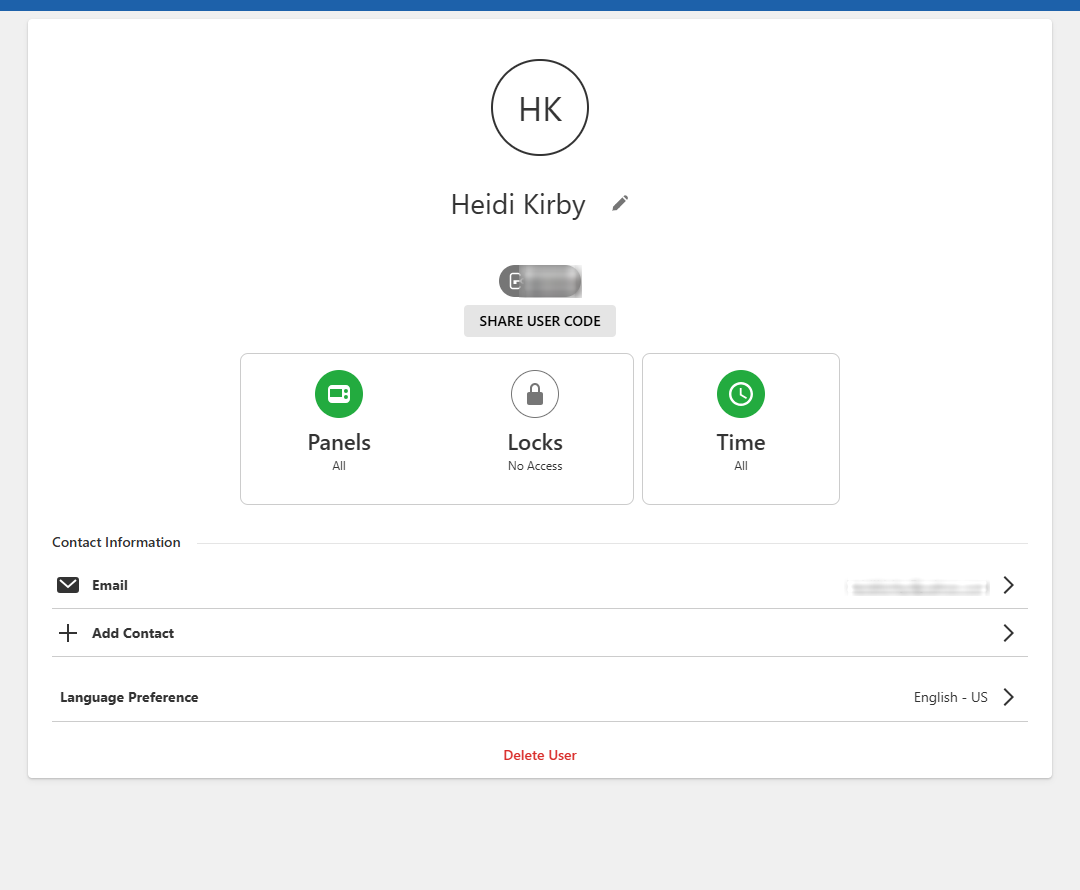
- Add Login is new and this is how you give someone a username and password so they can use the Alarm.com customer website and Alarm.com app. Manage Logins is no longer needed to do this. This row only appears for someone who cannot sign in yet. Once they can, it is replaced by a Username row showing their login name.
- Merge To is new. It is above the Delete User option. This can be used when the same person is listed twice.
Everything else is where it always was. This includes the users initials, their name and the option to edit (i.e.,  ), their keypad code, the Panels, Locks and Time cards, their contact details, the language setting, and the Delete User option.
| Old version | New version |
|---|---|
 |
 |
Someone who can already sign in
This used to be on a different page.
What is different?
- App Access shows what they are allowed to do, directly on their page. Select the desired user to change it.
- Username shows how they sign in. Someone without a sign-in gets the Add Login row instead. You will see one or the other, but never both.
- A small star (*) next to an email address or phone number means it belongs to their sign-in, so only they can change it. A starred phone number is also being used for their two-factor authentication, and has to be reset before a new one can be set up.
Selecting Username opens their sign-in
The images below display the login name, the email address tied to it, and the Delete Login option. This is where a sign-in gets removed. The delete icon (i.e., ) on the old Manage Logins page has been removed. The app works the same way.
| Old version | New version |
|---|---|
 |
 |
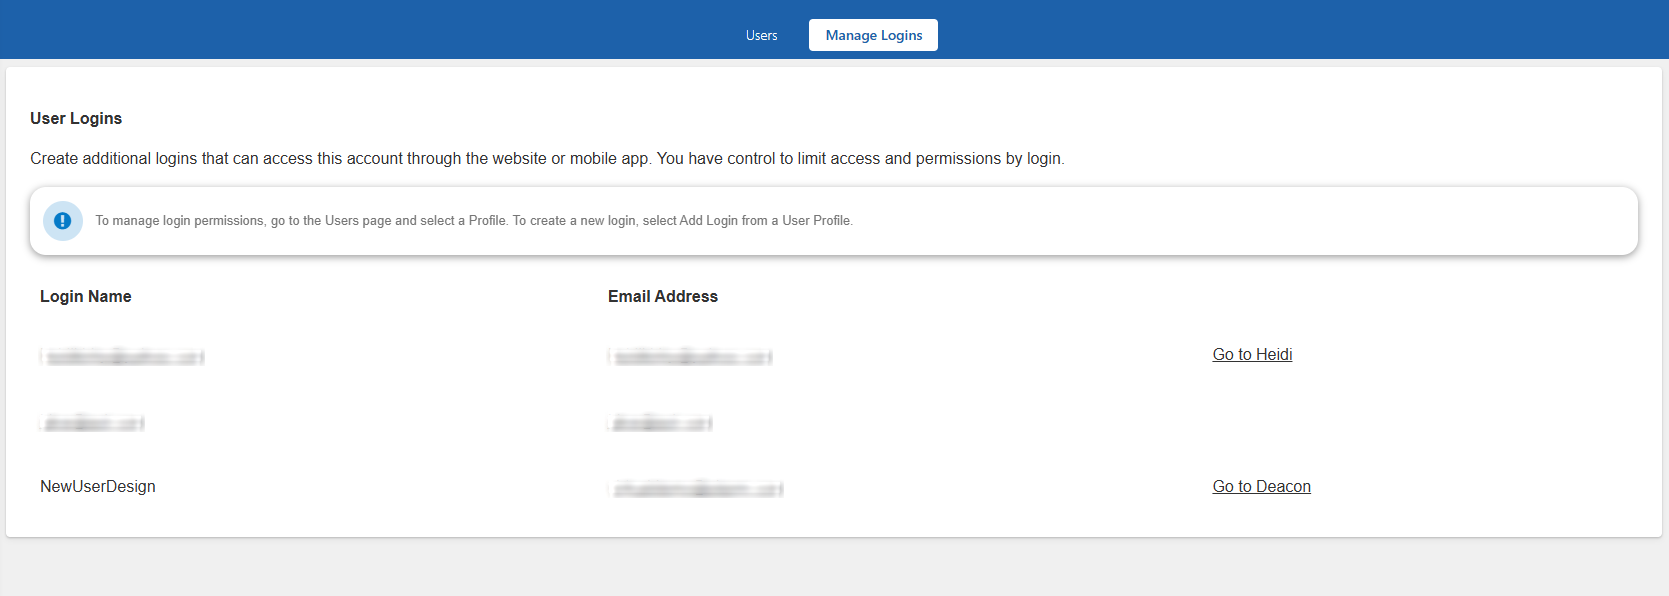
The Manage Logins page
What is different?
- A blue message at the top tells you to go to the Users page and select a person instead.
- The delete icons (i.e., ) have been removed. You can no longer delete a sign-in from this list.
- The names are no longer links. They are plain text now.
- Most rows have a Go to link instead, which takes you directly to that person's page.
- You can no longer add a sign-in here either. The Add a Login option has been removed. Adding a sign-in now happens on the person's own page, using Add Login.
| Old version | New version |
|---|---|
 |
 |
If the same person is listed twice
This is new and it can happen when someone had a separate sign-in that was not linked to their name. Entries can be merged together.
- Email addresses and phone numbers from both entries are kept.
- Only one keypad code and one sign-in can be kept between the two.
Caution: You cannot undo this. If it goes wrong, the only way back is to set the person up again from scratch.
To merge users using the Alarm.com app:
- Log in to the Alarm.com app.
- Tap
 .
. - Tap Users.
- Tap next to the entry to be deleted, then tap Merge To.
Note: If the person you want is not in the list, joining them would leave two keypad codes or two sign-ins on the combined entry, which is not allowed. Remove one of them first, then try again.
- Select the entry to be kept. Only entries that can be joined are shown.
- Review the preview screen. It shows you exactly what the joined entry will look like.
- Tap Merge Users.
To merge users using the Alarm.com customer website:
- Log in to the Alarm.com customer website.
- Click Users.
- Click next to the entry to be deleted, then click Merge To.
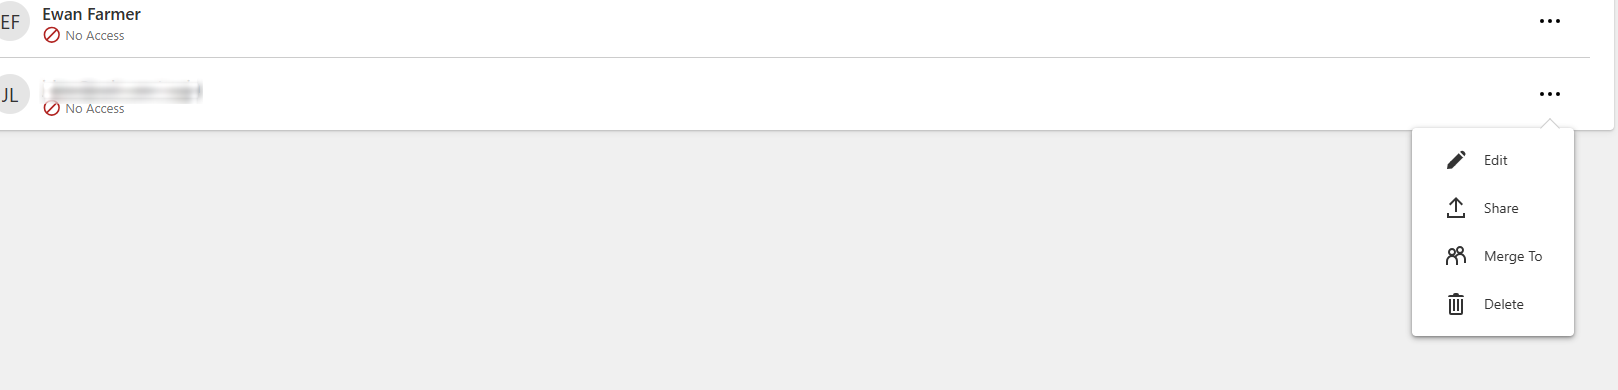
- Click Select next to the entry to be kept. Only entries that can be joined are shown.
Note: If the person you want is not in the list, joining them would leave two keypad codes or two sign-ins on the combined entry, which is not allowed. Remove one of them first, then try again.

- Review the preview screen. It shows you exactly what the joined entry will look like.

- Click Merge Users.

On your phone
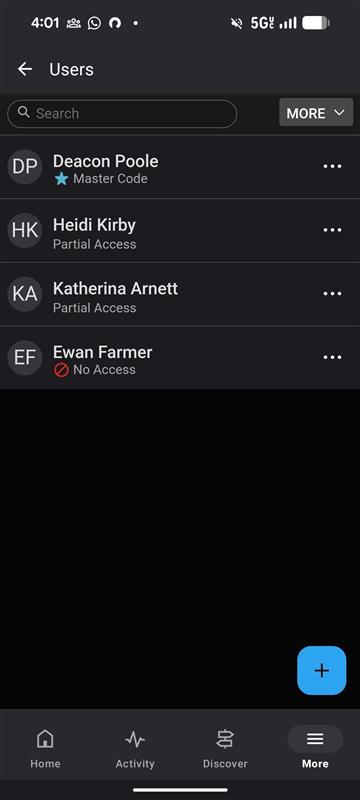
Managing sign-ins in the app is new. The images below show how sign-ins can be managed using Android and iOS devices.
The steps match the website (i.e., Click Users, select the desired user, then select App Access or Username).
Note: The app offers fewer access levels. On a phone, you can choose Master Control, Full Control or Read Only. If you need anything more detailed than that, it is recommended to use a web browser.
Android
| The Users list | A person's page | The sign-in screen |
|---|---|---|
 |
 |
 |
iPhone
| The Users list | A person's page | The sign-in screen |
|---|---|---|
 |
 |
 |
Frequently asked questions
Why are there are more people in my list than before?
Some sign-ins were not linked to anyone's name, so each one now appears as its own entry, named after the sign-in itself and marked No Access. Nothing was deleted and nobody was given new access. These entries can be renamed, or merge them with the correct user. Users can be merged using the Alarm.com app and Alarm.com customer website.
Note: Email addresses and phone numbers from both entries are kept. Only one keypad code and one sign-in can be kept between the two. This cannot be undone and the only way back is to set the person up again as a new user.
Why can't I change someone's email address or phone number?
If a username has a small star (i.e., *) next to them, it means it belongs to their sign-in, so only they can change it. If a phone number with a star, it is also being used for their Two-Factor Authentication. A number doing that job cannot be edited. It has to be reset first, and then a new one can be set up.
How can I tell who is able to sign in?
Not everyone in the Users list can. The label under someone's name, (e.g., Master Code or No Access), describes what they can do on the system, not whether they have a sign-in. You have to open the person and look. A Username row indicates they can sign in, and Add Login indicates they cannot yet.
Where did the trash can icon go from the Manage Logins page?
The trash can icon (i.e., ) has been removed from the Manage Logins page and has been moved to the Users page. On the Users page, select the desired user, select Username, then select Delete Login.
Can I undo joining two entries?
No. The person must be set up again from scratch. Review the preview screen carefully before changes are confirmed.
Someone is in the list who should not be there.
First, verify what it says under their name. An entry marked No Access cannot access anything.
If the user should not be there and should be deleted, click/tap , then click Delete.