Aeotec LED Light Bulb - Quick Start Guide
To add the Aeotec LED light bulb into a Z-Wave network:
- Install the LED bulb into a standard E27 socket.
- Turn on the LED bulb using the wall or lamp switch.
- Put the panel into Z-Wave Add mode. For panel-specific information about this process, see Panels.
- Turn off the LED bulb using the switch and immediately turn it back on.
- If the LED bulb is triggered properly and added to the Z-Wave network, it will flash green for approximately three seconds and then turn solid white.
- If the LED bulb is not triggered properly and is not added to the Z-Wave network, it will stay colored and not turn white. Please try triggering the bulb again.
- If you are unable to add the bulb to your network, it may already have been added to another network. Follow the procedure for deleting the bulb from a Z-Wave network and try the Add procedure again.
To delete the Aeotec LED light bulb from a Z-Wave Network:
- Verify that the light switch is in the On position.
- Put the panel into Z-Wave Delete mode. For panel-specific information about this process, see Panels.
- Flip the switch to turn the LED bulb off/on three times within 2 seconds (off, on, off, on, off, on).
- If the LED bulb is triggered properly and deleted from the Z-Wave network, it will turn yellow/orange and then turn white.
- If the LED bulb is not triggered properly and is not deleted from the Z-Wave network, it will stay solid. Please try triggering the bulb again.
To check if the LED bulb has already been added to a Z-Wave network:
- Verify that the light switch is in the On position.
- Flip the switch to turn the LED bulb off/on three times within 2 seconds (off, on, off, on, off, on).
- If the LED bulb has already been added to a Z-Wave network and is still part of that network, it will flash orange, turn red, and then return to the same solid color it was before the test.
- If the LED bulb is not currently in a Z-Wave network, it will flash blue for at least three seconds, turn solid orange, and then become white.
To put the LED bulb in color selection mode:
If the LED bulb is not currently in a Z-Wave network:
- Verify that the light switch is in the Off position.
- Flip the switch to the On position three times within 2 seconds (on, off, on, off, on). The bulb is now in color selection mode. It will turn solid white and then begin cycling through all of the available colors.
- Flip the switch to the Off position when the color you desire is displayed.
- You may now turn the LED bulb on and off for normal use with your selected color.
If the LED bulb is currently in a Z-Wave network:
- Verify that the light switch is in the Off position
- Flip the switch to On three times with 2 seconds (on, off, on, off, on). The bulb is now in color selection mode. It will cycle through all of the available colors.
- Flip the switch to the Off position when the color you desire is displayed.
- You may now flip the switch to On and control the bulb from the Alarm.com customer website and Alarm.com app.
Note: The dimming feature is not currently supported.
View and control multi-color lights
Control the light bulb color using the Alarm.com app:
- Tap
 to access the color picker for real-time control.
 - The color picker shows the color most recently requested.
- Color commands are sent immediately after a new color is selected. Colors are not added to the Recent section until the customer taps Done.

To control the Light Bulb color using the Alarm.com customer website:
- Log in to the Alarm.com customer website.
- In Lights, click the desired light.
- Use the color picker to choose the desired light color:
- Click the Color Palette to select the desired color.

- Click the Circle to select the desired white color.

Use the Presets section to choose the white temperature, or click Picker to choose a custom white option.
- Click the cards to select the desired color mood.
- Select between:
- Nebula
- Pacific
- Fiji
- Aurora
- Daybreak
- Canyon
- Dusk
- Cherry blossom
- Select between:
- Click the Color Palette to select the desired color.
Communicating with multi-color lights:
Customers can communicate events with multi-color lights using the Rules page on the Alarm.com customer website. Examples of rules include turning the bulb green when someone crosses the Geo-Fence, blue if the water sensor triggers, and red for an alarm.
- Log in to the Alarm.com customer website.
- In the Lights card, click
 .
. - Click Rules.
- Click Add New Rule.

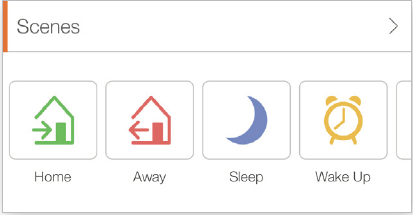
Maximizing comfort through Scenes and schedules
Multi-color lights can also be included in Scenes and schedules. This feature can improve comfort and even sleep cycles by waking up to cool lights and relaxing in the evening with warm lighting. Scenes can be edited to include multi-color lights from both the Alarm.com customer website and Alarm.com app.