Car Connector (ADC-3035L) - Installation Guide
Extend security and awareness outside your home or business with Alarm.com’s Connected Car. Track your vehicle’s location, view engine status, and analyze fuel efficiency – right from the Alarm.com app.
Enjoy peace of mind with driver safety alerts, diagnostic alerts, and more. Use this guide to quickly and easily install the Car Connector, a device that plugs into a vehicle’s OBD-II port, connecting the vehicle to the Alarm.com platform.
Installation precautions 
- Use an Alarm.com Authorized Service Provider to install or remove the Car Connector.
- If you choose not to use an Alarm.com Authorized Service Provider to install or remove the Car Connector, please carefully follow these instructions.
- Choose a safe location before installing, removing, or reconnecting the Car Connector.
- The Car Connector should never be plugged into or unplugged from the vehicle’s OBD-II port while the vehicle’s ignition is ON or in ACC/ACCESSORY mode, as this may cause issues such as dashboard lights to come on, but that should not affect the operation of the vehicle itself. Please ensure that the ignition is completely OFF before plugging in or unplugging the Car Connector. Should dashboard lights come on, they can usually be cleared by turning off the ignition and unplugging the Car Connector.
- When the Car Connector is plugged in, ensure it is installed securely and cannot easily be removed or come loose. If necessary, make use of cable ties to ensure a secure connection.
- Do not install the Car Connector in a manner that could obstruct the driver’s ability to safely operate the vehicle. If necessary, make use of an OBD-II extender cable to re-locate the position of the Car Connector.
- The Car Connector cannot share the Vehicle Bus (its internal communication network) with other devices that are also connected to the Vehicle Bus. Do not use the Car Connector in vehicles with devices such as wheelchair lifts or OnStar® that also communicate on the Vehicle Bus, or with a Y-cable to connect multiple devices to the OBD-II port at the same time. For any questions on whether a device in your vehicle is connected to the Vehicle Bus, please contact your Alarm.com Authorized Service Provider.
- The Car Connector uses a small amount of power from the vehicle battery while the ignition is off. If the vehicle’s ignition will be off for more than a week, it is recommended to unplug the Car Connector to prevent the possibility of draining the vehicle battery.
Pre-installation checklist
- Car Connector (included)
- Vehicle with an OBD-II port (standard on vehicles manufactured in 1996 or later). Hybrid and electric vehicles are not currently supported.
- The vehicle should not be in an underground garage or in an area where cellular coverage may not be available.
- A smartphone or tablet with an Internet connection
Add the Car Connector to an account
Before the Car Connector can send a vehicle's information to Alarm.com, it must be added to an account.
To add the Car Connector to an account using the Alarm.com customer website:
- Using a web browser, visit www.alarm.com/addcarconnector. You will need your username and password to log in to the account.
- Follow the on-screen instructions to install the Car Connector and add it to the account.
- Drive the vehicle for at least 10 minutes to calibrate the Car Connector. The first trip displayed in the Alarm.com app may have incorrect information before calibration is complete.
To add the Car Connector to an account using the Add Device Portal:
- Log in to the Alarm.com app. You will need your username and password to log in to the account.
- Tap
 .
. - Tap Add Device.
- Tap Car Connector.
- Follow the on-screen instructions to install the Car Connector and add it to the account.
- Drive the vehicle for at least 10 minutes to calibrate the Car Connector. The first trip displayed in the Alarm.com app may have incorrect information before calibration is complete.
To add the Car Connector by scanning the QR code:
- Scan the QR code below. You will need your username and password to log in to the account.

- Follow the on-screen instructions to install the Car Connector and add it to the account.
- Drive the vehicle for at least 10 minutes to calibrate the Car Connector. The first trip displayed in the Alarm.com app may have incorrect information before calibration is complete.
Installation
- Verify the vehicle’s ignition is OFF.
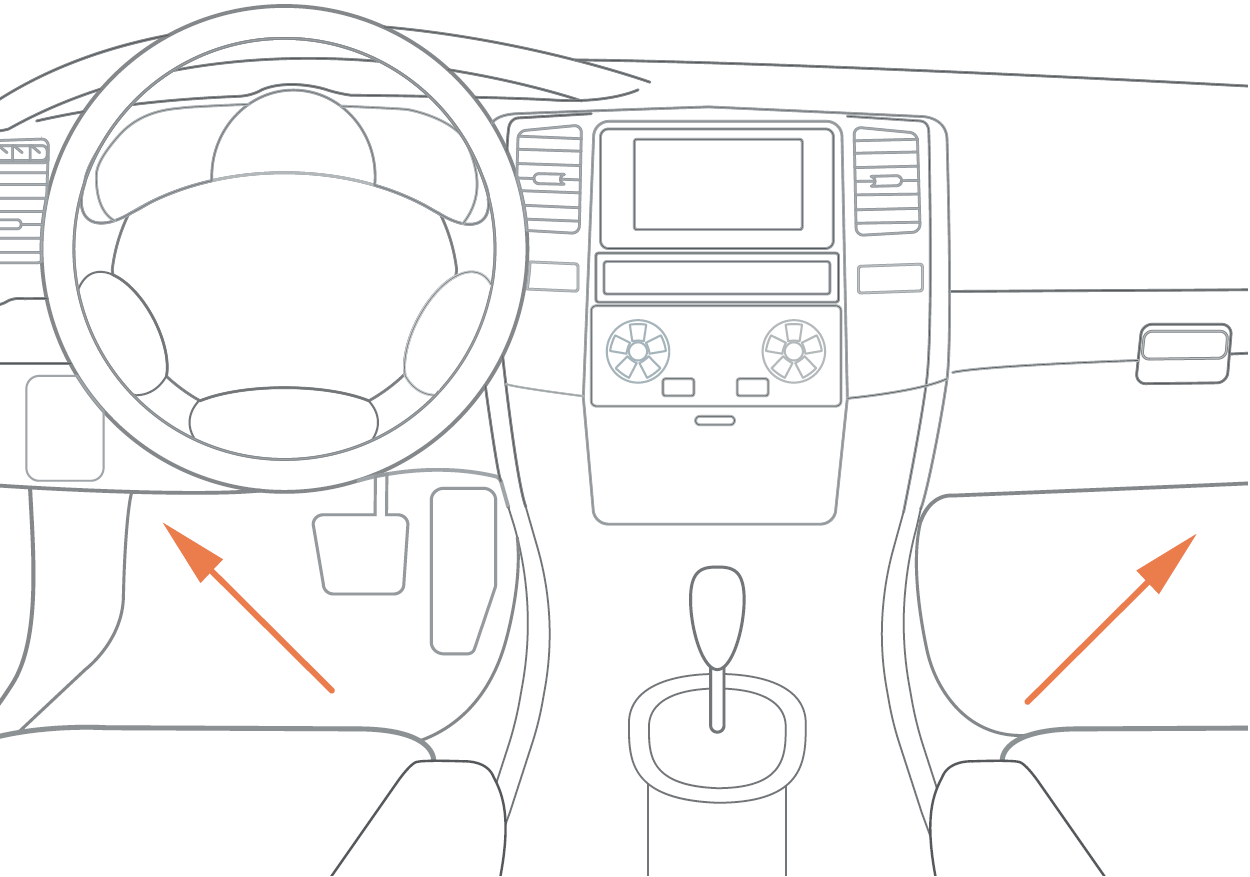
- Locate the vehicle’s OBD-II port. It is usually under the steering wheel or in the glove box. If necessary, please refer to the vehicle’s owner’s manual to help locate the OBD-II port.
LED guide
.png?revision=1&size=bestfit&width=415&height=250)
Ignition state
| LED pattern | Description |
|---|---|
| Red Off | Ignition is off or vehicle has not been detected |
 |
Ignition is on |
Communication
| LED pattern | Description |
|---|---|
| Orange Off | Modem is off |
 |
Connected to Alarm.com |
 |
Searching for cellular network |
 |
Connected to the cellular network but not to Alarm.com |
GPS
| LED pattern | Description |
|---|---|
| Green Off | GPS is off |
 |
GPS is on and the current location has been determined |
 |
GPS is on, searching for a location |
 |
Requesting time from the GPS satellites |
Troubleshooting
Car Connector is showing as not responding in the Alarm.com app or Alarm.com customer website
Alarm.com has not heard from the Car Connector in more than 24 hours. Ensure the Car Connector is firmly plugged into the vehicle’s OBD-II port and that it is in an area with cellular coverage.
Unplugged or plugged in events or notifications are received when the Car Connector was never unplugged
The Car Connector may have a loose connection to the OBD-II port. Ensure that it is firmly plugged in and use an extension cable if necessary.
The Alarm.com app status shows engine on when the vehicle is off
The Car Connector may have lost cellular connectivity and cannot send an engine-off message. This is common when the vehicle is parked in an area where cellular coverage may not be available, such as an underground garage. The message will be sent when connectivity is restored.
The car never appeared on the Cars card in the Alarm.com app
If the orange LED is not solid, park and turn off the car, then try unplugging the Car Connector and plugging it back in or moving the vehicle to an area with better cellular coverage. Try the installation again. Follow the Installation Precautions and directions above.
If the orange LED is solid and the red LED is off, park and turn off the car, then try unplugging the Car Connector and plugging it back in. Try the installation again. Follow the Installation Precautions and directions above. If the vehicle is a pre-2008 model year, ensure the Car Connector has been plugged into the OBD-II port with the ignition on for 30 minutes before attempting a fix.
Each trip is displayed as multiple smaller trips in the Alarm.com app
Your vehicle may have stop-start technology, which means the engine shuts off to save fuel when the vehicle is idling. Go to the Car Settings page in the Alarm.com app or Alarm.com customer website and turn on the Stop-Start Technology setting. If the vehicle is idling for long periods of time, it may still cause trips to be broken up.
Frequently asked questions
How many Car Connectors can be added to an account?
Up to five Car Connectors can be used simultaneously on a single account.
Does the Car Connector need to be deleted and re-added when installed in a new vehicle?
No. The new car should detect the Car Connector once it is plugged in and the ignition is started. Once calibration is complete after the first trip or so, the device name should update automatically to the make and model of the new car.
What if the device obstructs normal driving operation when plugged in?
The Car Connector can be connected to an OBD-II extension cable for installation in a better location in the vehicle. Never use the device in a way that could potentially interfere with your ability to safely operate the vehicle.
Why is the fuel level not displaying for my vehicle?
Reading of the fuel level is not supported on your vehicle. The fuel level can only be displayed when the vehicle reports a value through the OBD-II port and the Car Connector is able to read it.
What is the Hibernating status?
If your car’s engine has been off for a week, the Car Connector will enter a deep sleep mode to prevent draining the car’s battery. The Car Connector will stop communicating information until the engine is started again.
Why did I not get a notification when the low fuel indicator on the vehicle dashboard turned on?
The low fuel notification is sent when the fuel level drops below the user-defined threshold in the Car Settings page in the Alarm.com app or Alarm.com customer website that may be different from when the vehicle reports low fuel.
When will I get notifications for excessive speed, sudden acceleration, or hard braking?
Thresholds for these alerts can be configured by going to the Car Settings page in the Alarm.com app or the Alarm.com customer website.
How accurate is the Car Connector's location?
The Car Connector uses integrated GPS, which allows for accuracy of around 2 meters. GPS signals are more accurate when the Car Connector has a clear and unobstructed view of the sky and will be degraded by some factors (e.g., proximity to tall structures, driving under a tunnel, etc).
Questions?
Browse additional Connected Car articles in the Knowledge Base or contact your Alarm.com Authorized Service Provider.
Notices
Federal Communication Commission interference statement
This device complies with part 15 of the FCC Rules. Operation is subject to the following two conditions:
(1) This device may not cause harmful interference, and
(2) this device must accept any interference received, including interference that may cause undesired operation.
This equipment has been tested and found to comply with the limits for a Class B digital device, pursuant to Part 15 of the FCC Rules. These limits are designed to provide reasonable protection against harmful interference in a residential installation. This equipment generates, uses and can radiate radio frequency energy and, if not installed and used in accordance with the instructions, may cause harmful interference to radio communications. However, there is no guarantee that interference will not occur in a particular installation. If this equipment does cause harmful interference to radio or television reception, which can be determined by turning the equipment off and on, the user is encouraged to try to correct the interference by one of the following measures:
- Reorient or relocate the receiving antenna.
- Increase the separation between the equipment and receiver.
- Connect the equipment into an outlet on a circuit different from that to which the receiver is connected.
- Consult the dealer or an experienced radio/TV technician for help.
Any changes or modifications not expressly approved by the party responsible for compliance could void the user’s authority to operate this equipment.
IC Statement
This device complies with Industry Canada license-exempt RSS standard(s). Operation is subject to the following two conditions:
(1) This device may not cause interference, and
(2) this device must accept any interference, including interference that may cause undesired operation of the device.
Le présent appareil est conforme aux CNR d’Industrie Canada applicables aux appareils radio exempts de licence. L’exploitation est autorisée aux deux conditions suivantes:
(1) L’appareil ne doit pas produire de brouillage, et
(2) l’utilisateur de l’appareil doit accepter tout brouillage radioélectrique subi, même si le brouillage est susceptible d’en compromettre le fonctionnement.
RADIATION EXPOSURE STATEMENT
The device has been found to be compliant to the requirements set forth in CFR 47 Sections 2.1091 and Industry Canada RSS-102 for an uncontrolled environment. The antenna(s) used for this transmitter must be installed to provide a separation distance of at least 20 cm from all persons and must not be co-located or operating in conjunction with any other antenna or transmitter.
Le dispositif a été jugé conforme aux exigences énoncées dans les articles 47 CFR 2.1091 et Industrie Canada RSS-102 pour un environnement non contrôle’. L’antenne(s) utilisée pour ce transmetteur doit etre installé pour fournir une distance de séparation d’au moins 20 cm de toutes les personnes et ne doit pas être co-localisés ou fonctionner en conjunction avec une autre antenne ou transmetteur.